THE Dublin Horse Show is renowned for showcasing the epitome of Irish horses and Irish breeding. Every exhibitor and horse that steps into the hallowed arenas knows that they are up against the best our island has to offer, and with that in mind, competitors do their utmost to stand out and impress the judges – turnout and attention to detail are everything.
There are many grooming techniques that can be used to show off your horses and make them look their best. This week we focus on the quarters and how different patterns or quarter marks can be used to accentuate the hindquarters.
Quarter marks are traditionally a few flashes (wide stripes that begin at the spine and come down over the top of the croup). Flashes are typically seen in hunters – for a hack or riding horse, you will find a checkboard pattern on the croup. Below the design on the croup, along the flank, you will often see shark’s teeth. In racing or eventing it is common to see a range of different patterns such as flags, checks, and custom patterns.
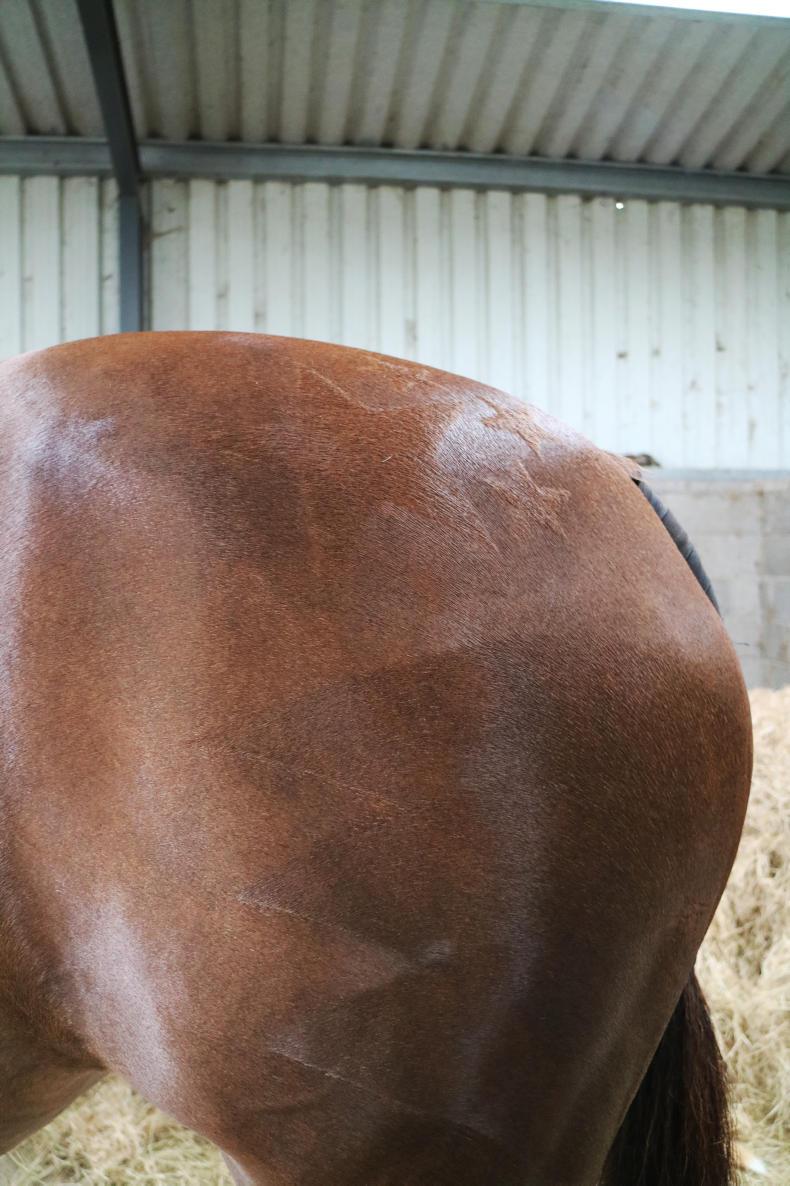
Quarter marks are designed to accentuate your horse’s quarters and can also be helpful in detracting attention from weaker areas on the horse’s body.
EQUIPMENT
Before you begin applying quarter marks, make sure you have gathered all the equipment you might need:
Preparing the quarters
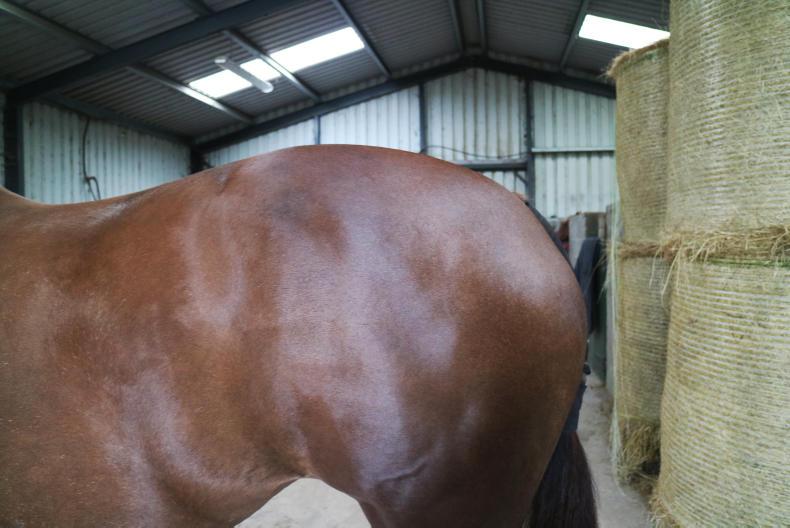
The horse’s coat must be thoroughly cleaned before applying any quarter marks, otherwise dust and loose hair will rise to the surface, which looks unsightly. When your horse is clean, dampen down the quarters with a sponge and some water. The purpose of using water is to make the hair easier to brush against its normal grain and to sharpen the lines of the patterns and make them stand out.
Some people add an oil to the water or spray the quarters with an oil to give the coat a shine. I avoid using oil as it can make the quarters sticky, trapping dust and sand, etc. during the warm-up. Instead, once the coat has been dampened down, apply a coat setting spray.
This will help hold the marks in place and make them stand out to give a professional finish for the show ring or arena.
Now you are ready to start marking up your horse.
FLASHES

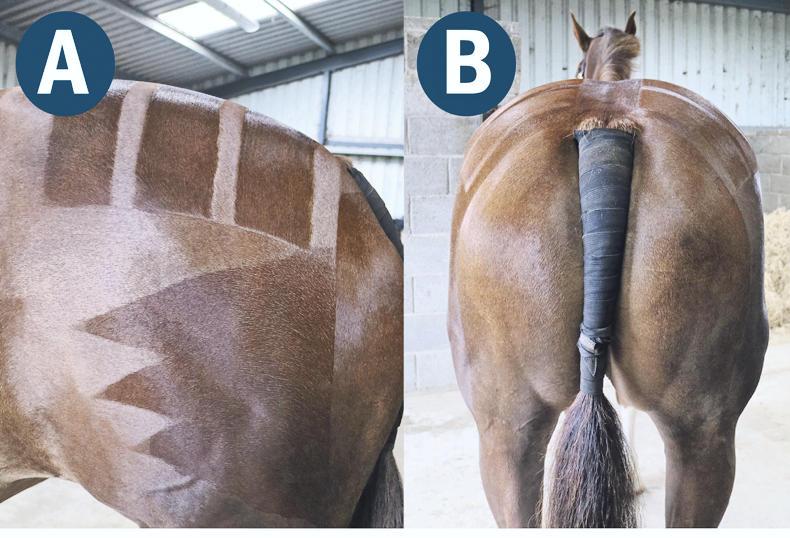
Simple flashes (A) are one of the easiest quarter marks to apply. This design works really well on hunters with large, powerful hindquarters. Flashes are simple yet striking. If you want to give your flashes a little something extra you can add a little window design (B).
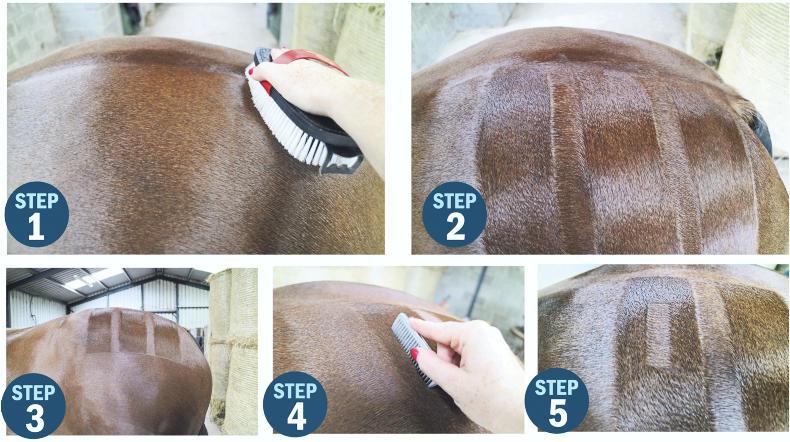
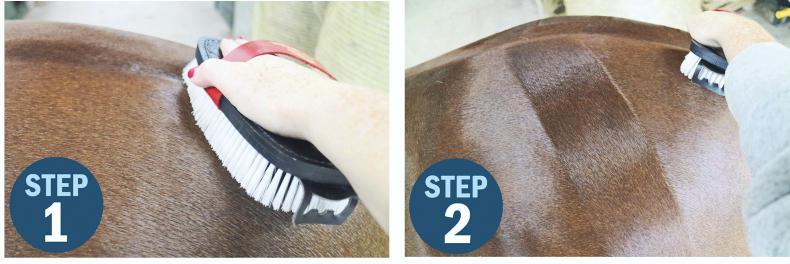
Step 1. After preparing the quarters for the pattern, take your body brush and line it up perpendicular to the dorsal line, approximately a hand’s width above the top of the tail. Brush down in a straight line until you pass the point of the hip.
Step 2. Repeat the first step until you have three vertical flashes on the quarters. Try to ensure there is even spacing between each flash and that the brush strokes are definite and straight.
Step 3. Even out the lower edge of the flashes by brushing across the ends, in the same direction as the coat.
Step 4. If you want to add the window design to your flashes, take up your mane comb, holding it vertically, stroke across the coat within the flash.
Step 5. Make sure the window design is centred within the flash. On horses you can make two window designs per flash. On a small pony you might only have room for one.
DIAMOND/CHECKBOARD
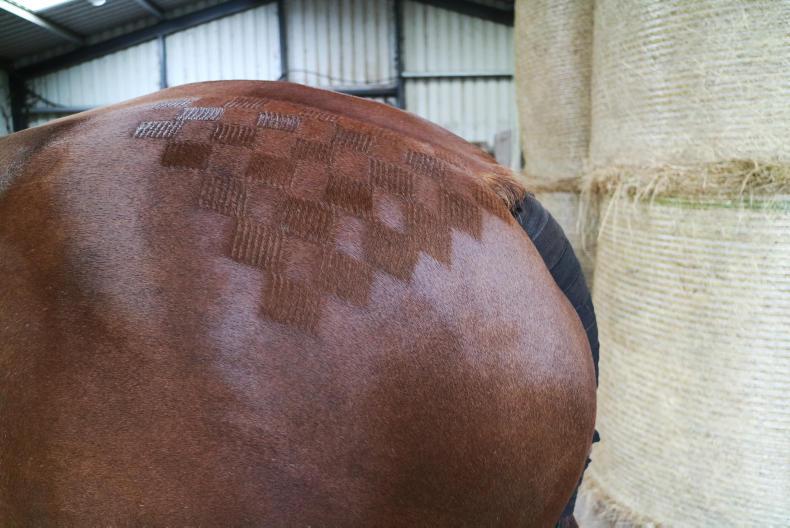
The diamond and checkboard are two of the most classic designs. Generally the squares range in size from 2.5cm to 5cm, depending on the size of your comb. The checkboard design works best on horses or ponies with large even quarters. The diamond design is a bit more compact, so this design looks good on horses with more pointed hindquarters, or who are a bit delicate (mares, smaller horses and ponies).
These designs are most commonly seen on hacks, riding horses and ponies.
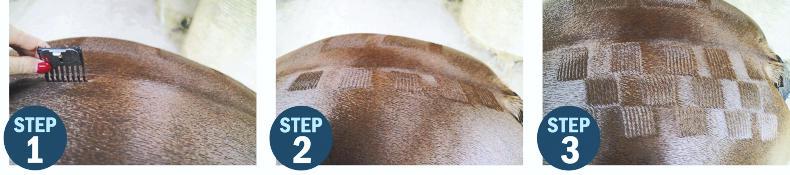
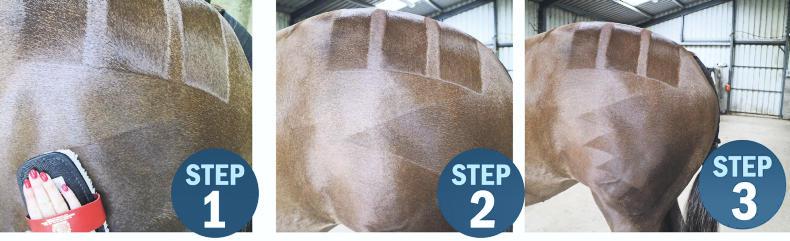
Step 1. The checkboard and diamond start the same way. Place your comb about a hand’s-width off the dorsal line at the top of the croup and make a downward stroke to create a square.
Step 2. Move over one comb-width. Create another square and repeat until it is the width you want.
Step 3. For the lower rows the same technique applies, but if you are doing a diamond pattern you need to bring each row in a square at the edges, so that you end with one square.
THE ‘V’

This design is again created using the body brush. This pattern is suited to horses with pointy/steep croups, or those who seem to lack a bit of muscle.
Step 1. Prepare the horse’s quarters as normal. Starting just at or behind the point of the croup, brush diagonally downward to the centre of your horse’s quarters.
Step 2. To create the other side of the ‘V’ place your brush just above the top of the dock, brushing diagonally downward, to intersect with the other lower edge. To finish the ‘V’ straighten of the point of intersection.
STENCIL MARKINGS
The flash, ‘V’, and diamond/checkboard designs always look smarter when created by hand. They might seem complicated to create at first but with a little practice you will be able to create them quickly and effectively every time.
However, if you are finding these designs too difficult to create, or you want to do a customised design like stars or shamrocks, a stencil can be very effective.
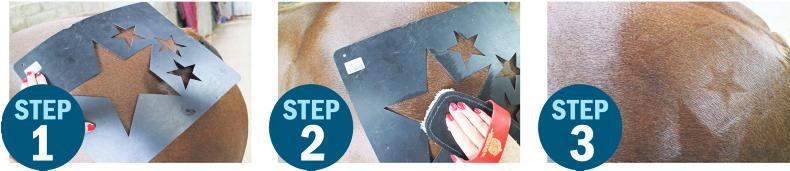
Step 1. Prepare the quarters as normal. Lay your stencil on the croup where it can be subtly seen, not too high and not so low that you will run out of space for your shark’s teeth.
Step 2. Using your body brush run across the stencil, against the lie of the coat.
Step 3. Lift the stencil and examine the coat for unwanted marks that may be caused by brushing over the perimeter of the stencil. Simply use a small brush to gently smooth out these marks.
SHARK’S TEETH
Once the upper portion of the quarters is decorated, it is time to add shark’s teeth. Shark’s teeth compliment the upper portion of the quarter marks.
Step 1. Begin with your brush just above the centre of the horse’s flank, brush upward against the coat.
Step 2. Bring your brush back to the point at which you started the shark’s teeth, but this time stroke down with the hair, to create the first tooth.
Step 3. Move your starting point about an inch down the flank and repeat steps 1 and 2 until you have three shark’s teeth.
FINISHING TOUCHES
Certain markings require a few final finishing touches, namely flashes, the ‘V’ and the checkboard/diamond.
Lining off the buttocks helps to accentuate this area of the horse. These lines are clearly visible when viewing the horse from the side and from behind. Start at the top of the dock and stroke downward to the end of the buttock (A).
Lastly, line the dorsal stripe by placing your body brush on the dorsal stripe at the top of the croup and brushing along the stripe until you reach the dock (B).