OVER the years I have groomed for a number of different people and I have also worked with a number of different grooms - one thing that I have noticed is that everyone has their own slightly different way of pulling and plaiting manes.
Certain techniques work on certain horses and will look less than perfect on others. So any methods discussed here can be adapted to suit you and your horse’s needs.
Plaiting is made quicker and easier when the mane is neatly pulled. After pulling, when the mane is brushed out and dampened down, it should be about 4-5 inches long. Plaiting can be made slightly more difficult when you encounter:
TYPE A
There are a number of mane-thinning combs on the market and they are usually available to purchase in most good tack shops. Before pulling a very thick mane I would firstly brush it out and get rid of all the tangles and loose, dead hair.
Start by using the mane-thinning comb on the underside of the mane to thin the mane slightly, before pulling it to the desired length. With some of the extra hair gone it makes the job of pulling the mane a little bit easier and quicker.
Be careful not to thin the mane too much at the beginning, you can always use the thinning comb again, after the mane has been pulled to the desired length, to thin it further.
TYPE B
Thin manes usually cause a lot of dispute. Many believe you should never cut a mane with scissors as it will leave it unsightly and with a very obvious edge, unlike the more natural finish you get from pulling. However, using scissors on manes is quite common amongst showjumping grooms. If you don’t want to use a scissors then a very thin mane should be shortened by carefully breaking off the ends of the hair with the fingers.
However, in my own experience, I have found that using scissors can, over time, help a very thin mane to thicken out. My own horse’s mane is naturally on the thin side and I would usually use scissors as opposed to pulling. Thankfully there are ways and means of making it look less obvious.
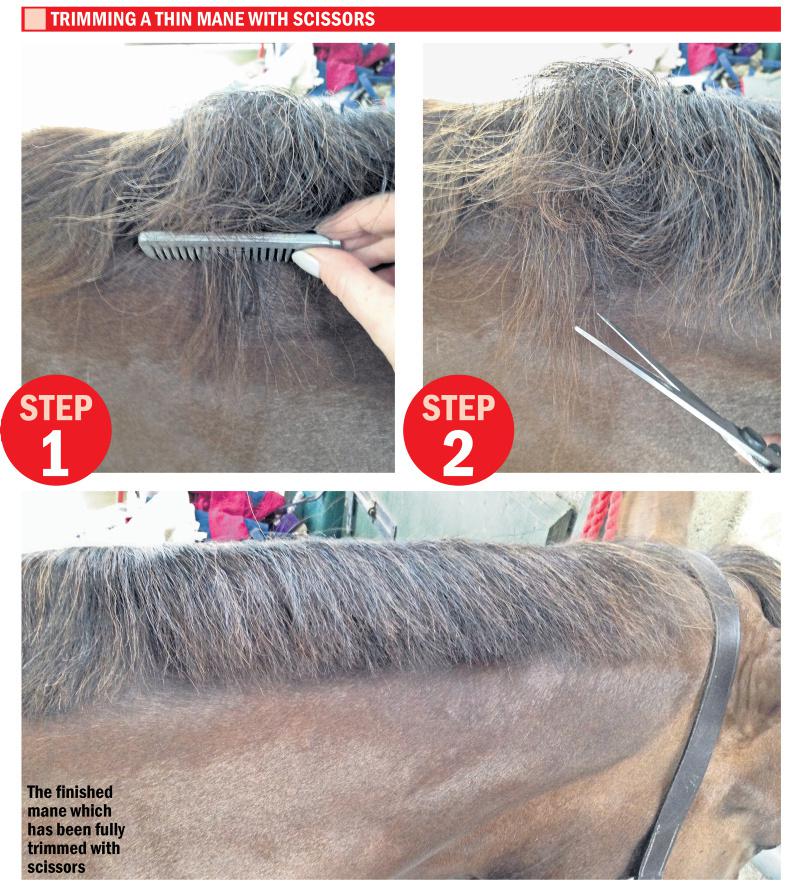
I begin by brushing it out as normal. Then, starting at the poll, I take a few strands of mane and backcomb up to the roots. (Step 1) Normally this is where you would wrap the long underneath hairs around the comb and pull them out.
Instead, take a scissors and trim the hair to the desired length (Step 2). Rather than cutting straight across I would either chip into the hair or pull the blade of the scissors down along the ends of the hair until they break. This will help reduce a very straight-cut finish.
Brush the backcombed part of the mane out. You may need to repeat the above steps again to fully shorten the mane.
PLAITING
The mane should always be encouraged to lie on the off-side of the horse’s neck and can be trained to do so by regular brushing, damping down and, when the horse is stabled, by loose plaiting.
Before you begin plaiting first gather all the tools you will need:
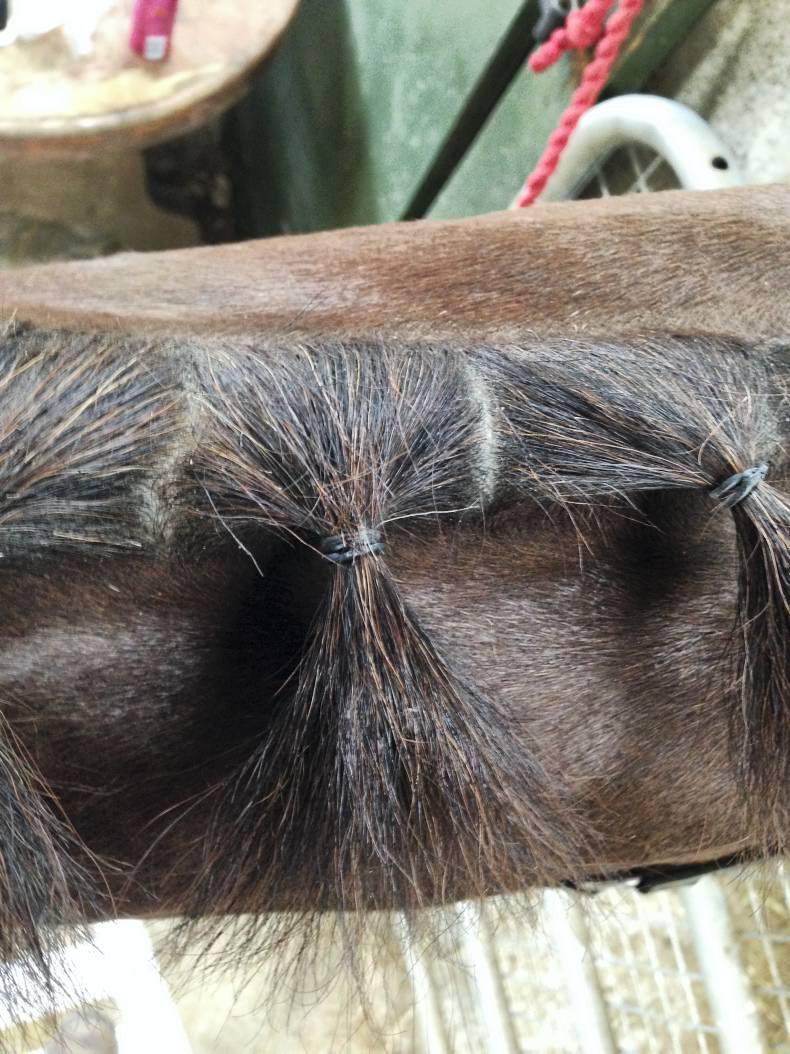
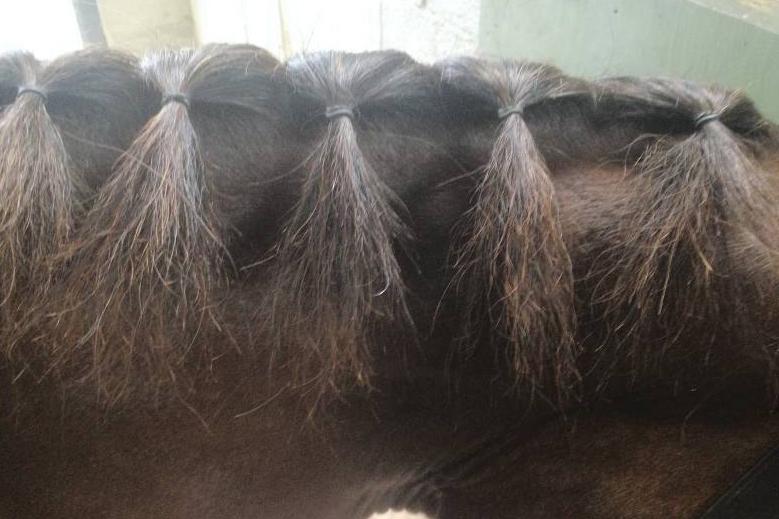
EVEN SECTIONS
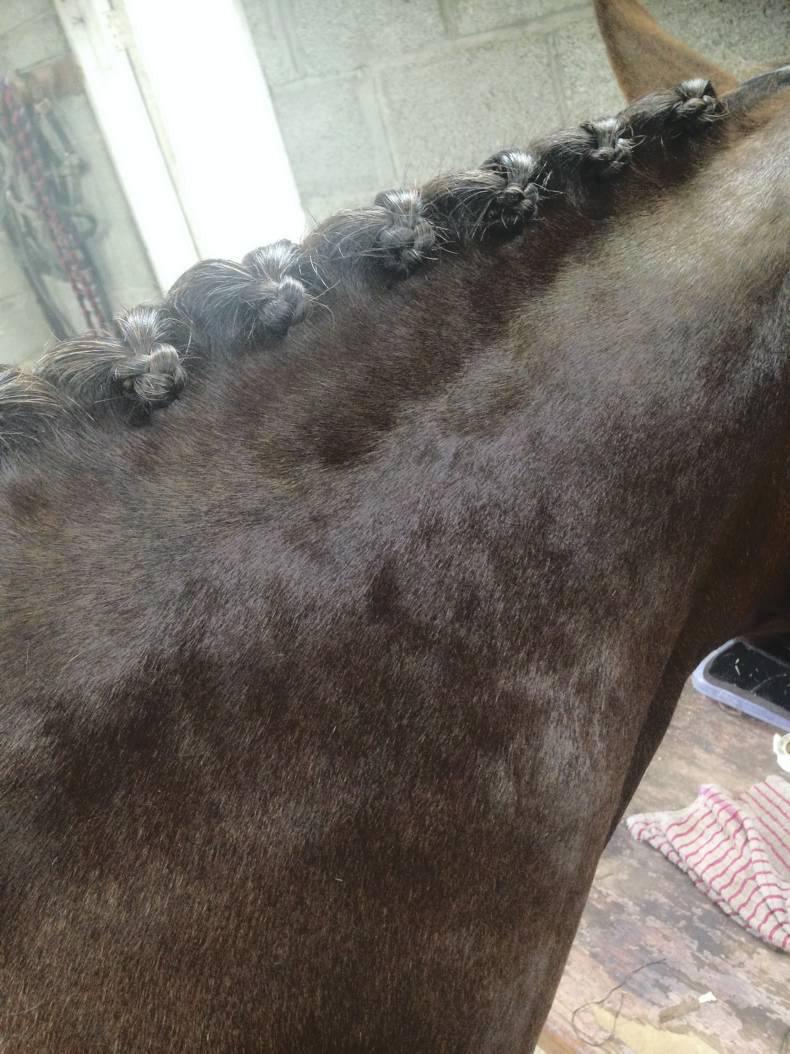
Whether you are plaiting with bands or thread first you need to evenly section the mane. Some choose to start at the withers, others start at the poll but I start at the poll so that if left with a smaller uneven piece of mane it is at the withers where the plait will be less noticeable.
Plaits in the mane are usually odd in number, seven, nine, 11 and 13 are most common, with the plait in the forelock making it an even number in total.
An even number of plaits in the mane is said to result in the eye automatically splitting the neck in half and making the neck appear shorter. An uneven number is said to prevent this from happening.
This time last year I spoke with Ciara O’Connell, from the Side Saddle Association of Ireland, who stated that: “A lady’s horse should be immaculately turned out and wearing a double bridle, with his mane in seven plaits and his tail neatly pulled.” Seven plaits specifically and many would agree, stating that the golden rule was seven or nine plaits.
Earlier this week I spoke to Sarah Conway, head girl at Orchard Lodge Stables and ISA judge, Sarah’s advice was: “When it comes to showing I would always stand back and ask myself, ‘do the plaits enhance the look and suit the type of horse?’ If the answer is ‘yes’ then I’m happy.
“Small dainty plaits will make a short, thick neck look better proportioned whilst fewer large plaits built up along the crest will make a long, thin neck appear to carry more muscle. When you’re aiming for something like the Dublin Horse Show the finer details really make a difference.”
There should be a sharp, straight parting between plaits and as much as possible, the plaits should be the same size.
The last few plaits on the neck as you approach the withers are normally slightly smaller in size as the hair thins towards the withers.
*NOTE:
It is not advisable to plait manes the night before an event. Hay and bedding can get stuck in the plaits, some hairs can break and the result is untidy.
The horse may also try and rub out the plaits, so it is always best to plait on the morning of a show if possible. Lycra hoods can be bought to cover the horse’s head, neck and body. If you need to plait the night before these can be useful in keeping your plaits intact.
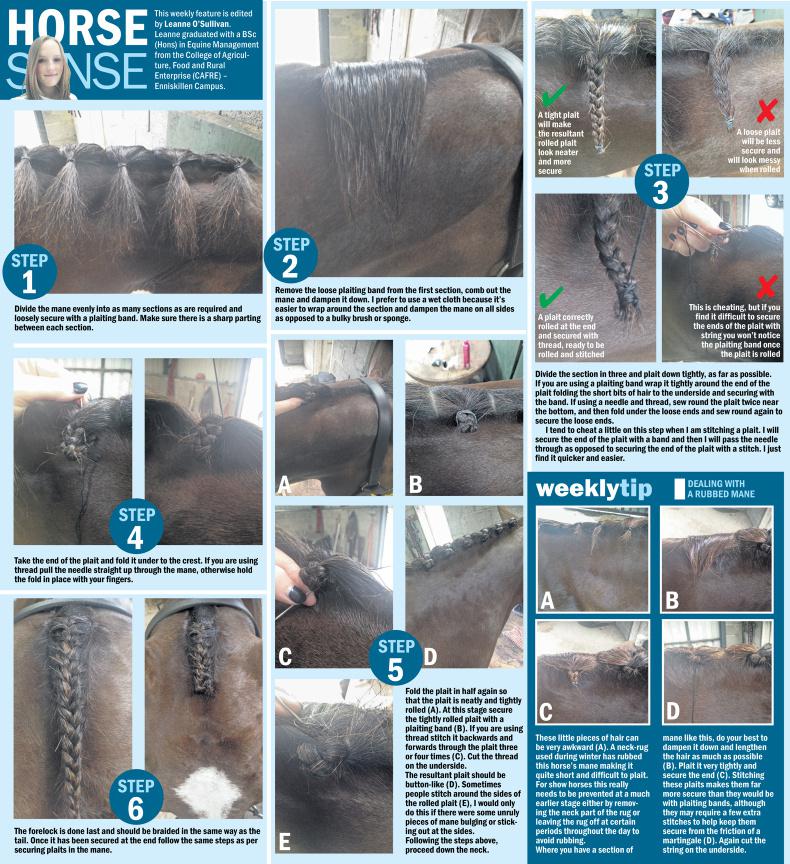
STEP 1
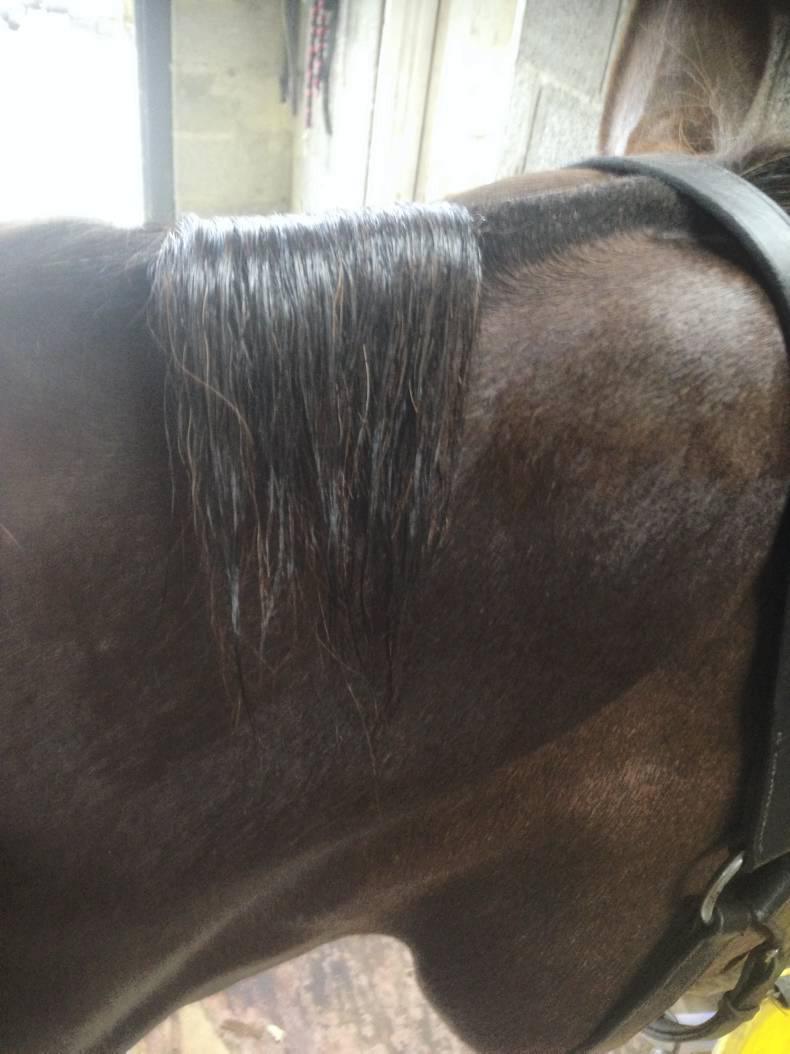
Divide the mane evenly into as many sections as are required and loosely secure with a plaiting band. Make sure there is a sharp parting between each section.
STEP 2
Remove the loose plaiting band from the first section, comb out the mane and dampen it down. I prefer to use a wet cloth because it’s easier to wrap around the section and dampen the mane on all sides as opposed to a bulky brush or sponge.
STEP 3
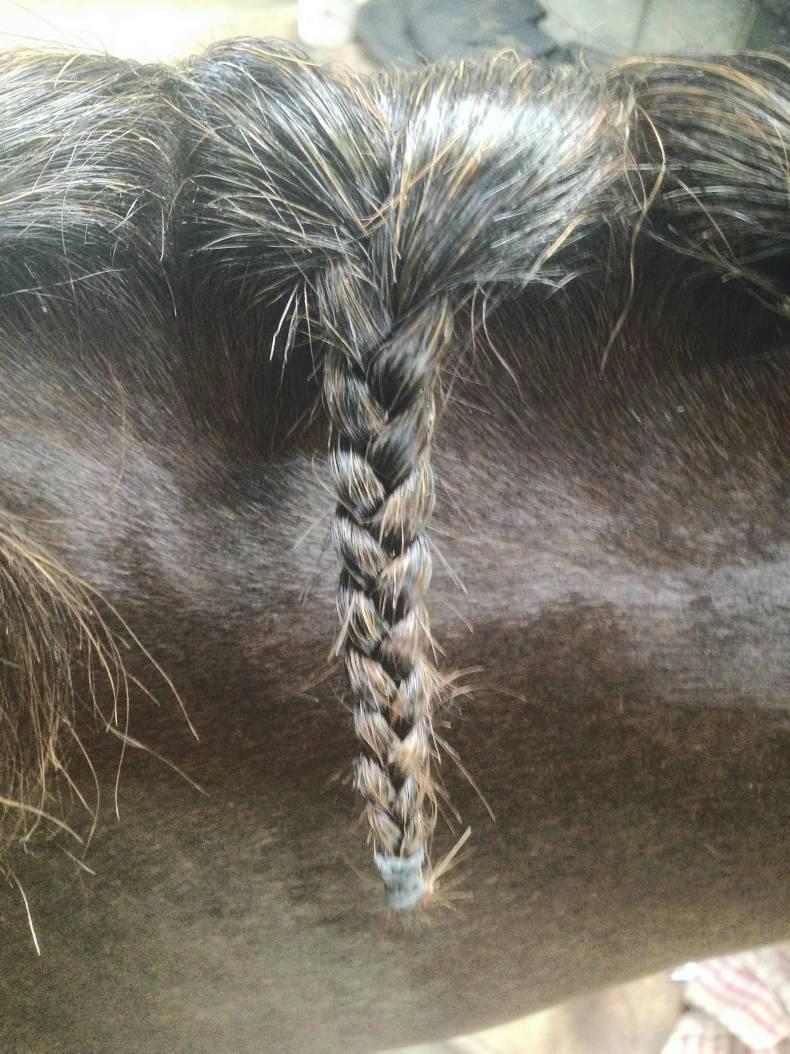
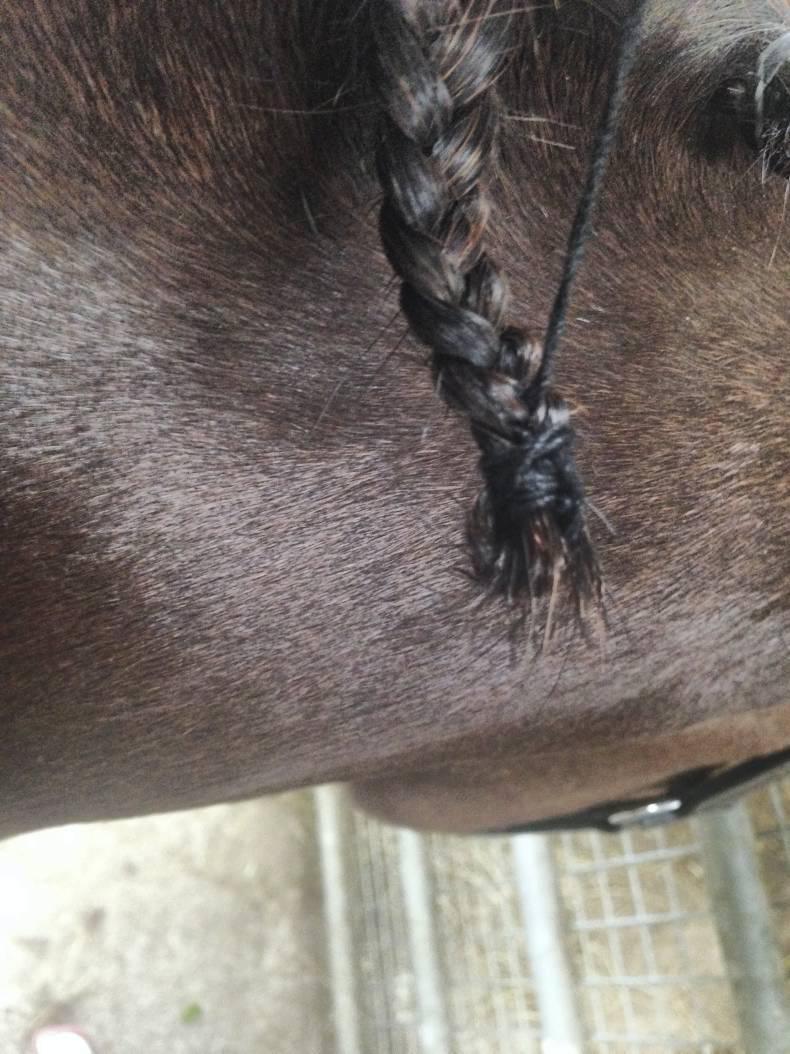
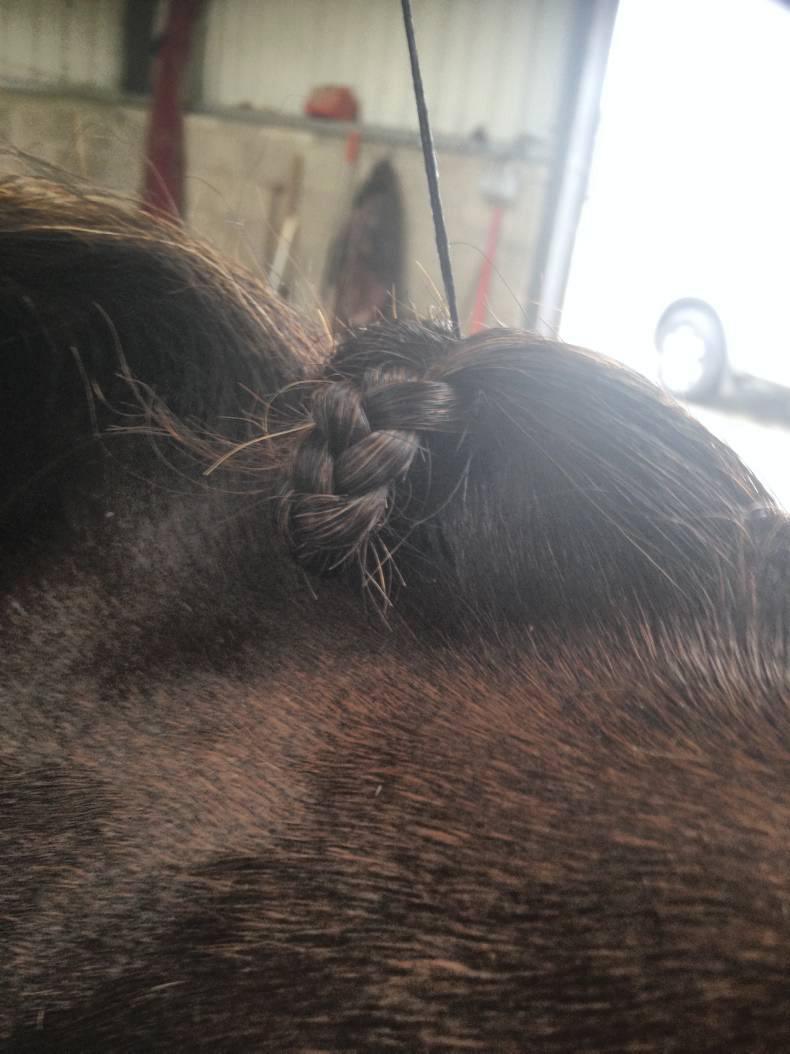
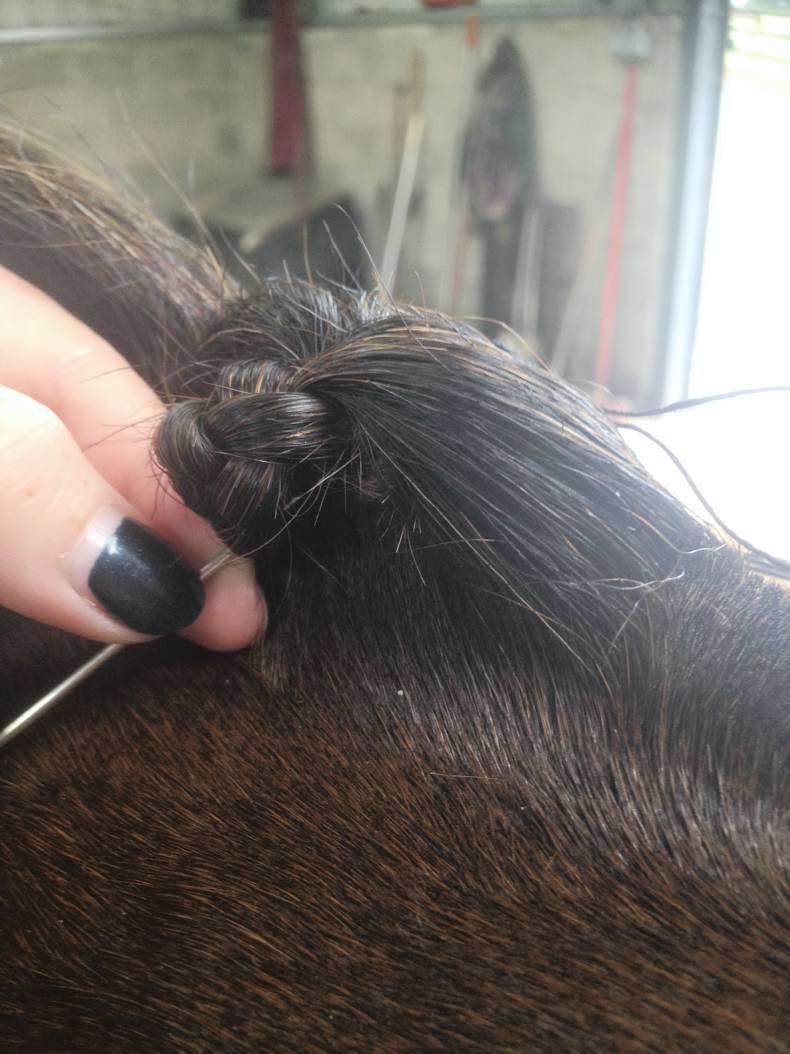
Divide the section in three and plait down tightly, as far as possible. If you are using a plaiting band wrap it tightly around the end of the plait folding the short bits of hair to the underside and securing with the band. If using a needle and thread, sew round the plait twice near the bottom, and then fold under the loose ends and sew round again to secure the loose ends.
I tend to cheat a little on this step when I am stitching a plait. I will secure the end of the plait with a band and then I will pass the needle through as opposed to securing the end of the plait with a stitch. I just find it quicker and easier.
STEP 4
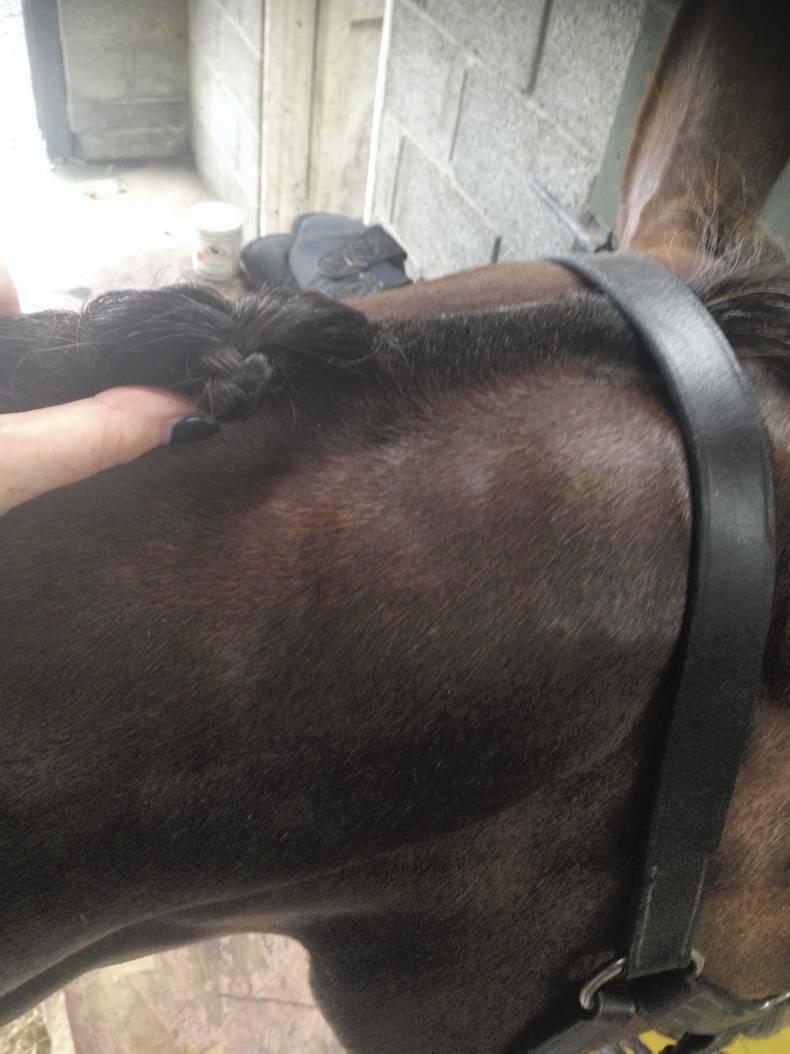
Take the end of the plait and fold it under to the crest. If you are using thread pull the needle straight up through the mane, otherwise hold the fold in place with your fingers.
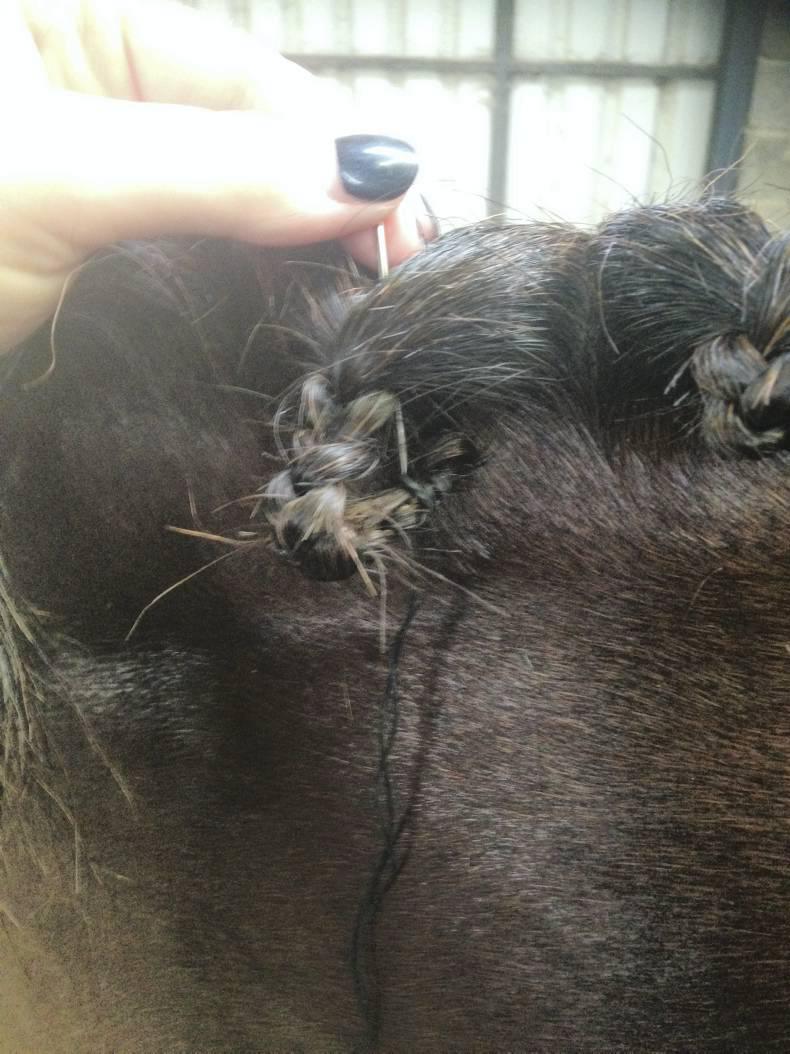
STEP 5
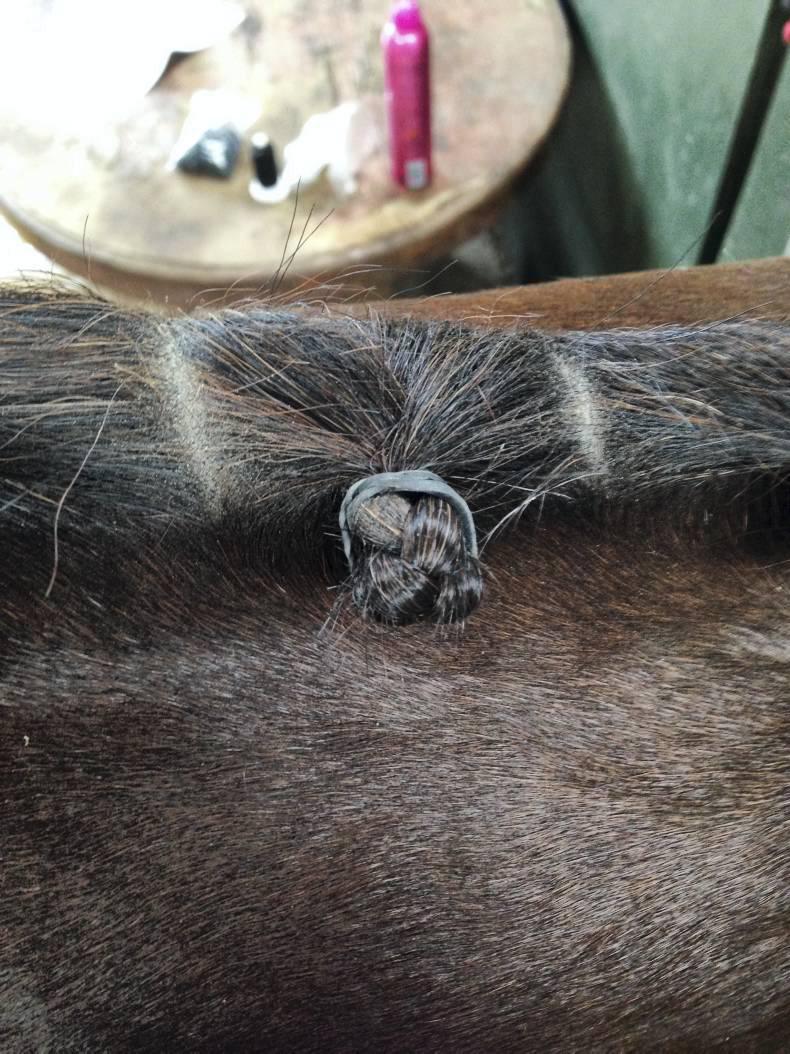
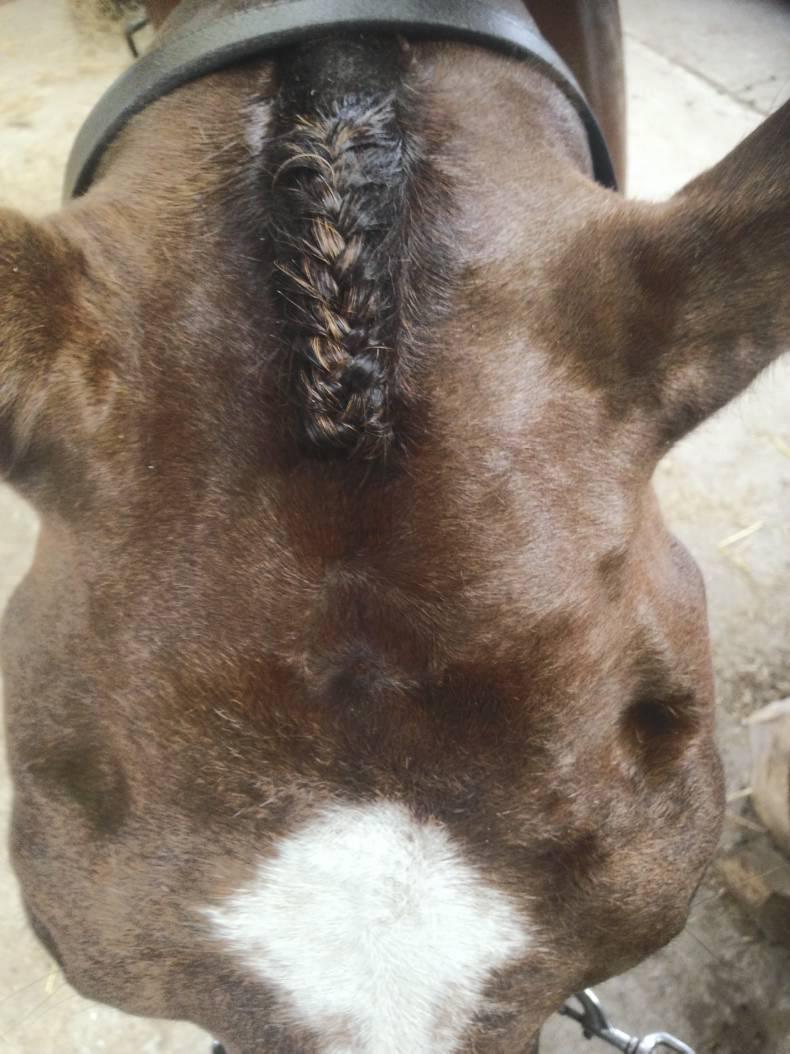
Fold the plait in half again so that the plait is neatly and tightly rolled (A). At this stage secure the tightly rolled plait with a plaiting band (B). If you are using thread stitch it backwards and forwards through the plait three or four times (C). Cut the thread on the underside.
The resultant plait should be button-like (D). Sometimes people stitch around the sides of the rolled plait (E), I would only do this if there were some unruly pieces of mane bulging or sticking out at the sides.
Following the steps above,
proceed down the neck.
STEP 6
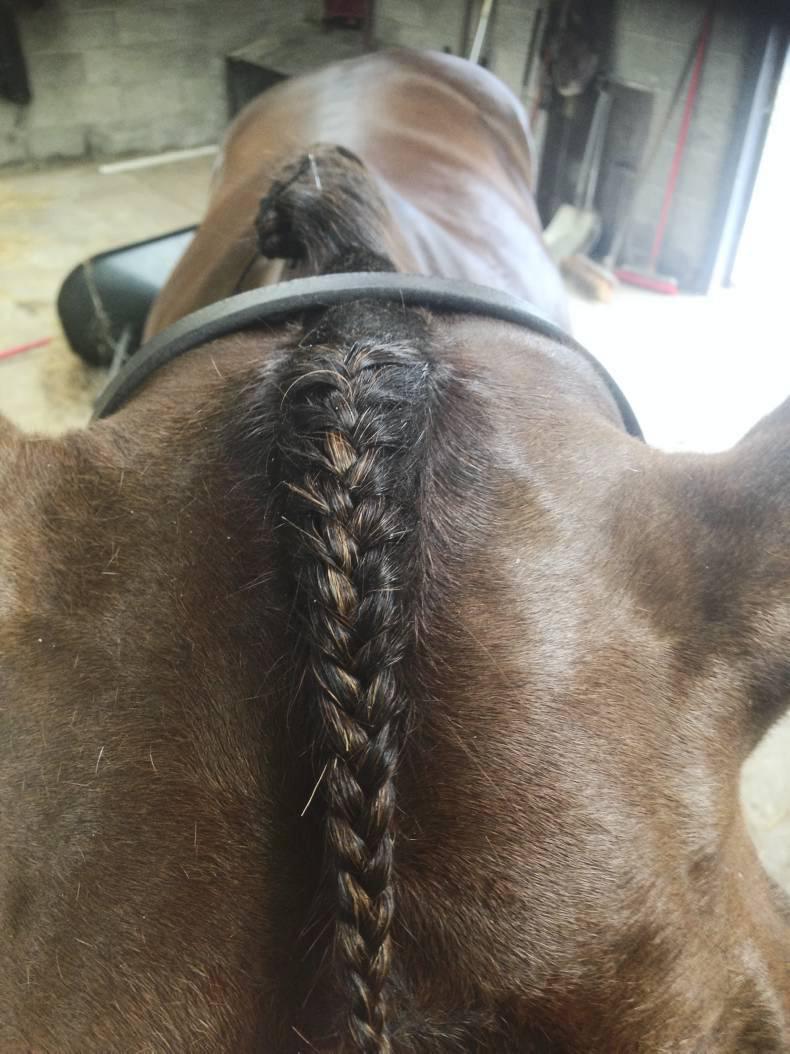
The forelock is done last and should be braided in the same way as the tail. Once it has been secured at the end follow the same steps as per securing plaits in the mane.